Showing posts with label nailpolish. Show all posts

Tuesday, July 8, 2014

Bo-Po Brush on Peel off nail polish review!!

I'm super excited tonight to bring to you a review of a nail polish that is targeted towards kids! My daughter LOVES nail polish and is always excited to try out my colors, so she and I both are excited about this post!

A little background infomation on Bo-Po nail polish:
Created by Worx Toys, Bo-Po Brush on, Peel off nail polish brings us all back to our childhoods by providing a product that has hasn't been around in years: a nail polish that is totally able to peel right off without requiring any remover to take it off! 
When I saw this campaign on Tomoson, I knew immediately that I had to apply! My daughter is 6 years old, and she loves her nails painted just like mine, but she has this bad habit where she will get in the bathtub and peel every bit of it off. OR she will pick a really horrible glitter color that is impossible to take off and we will have to sit and scrub and scrub until we can finally get the stupid stuff off. 
Bo-Po polish provides a solution to this, in that she can seriously just paint them herself whenever she wants to, and when she gets tired of the color, she can peel it right off! The bottle is also SPILL PROOF! So she really can do it all by herself!
We tried it out tonight, and it's really really cool!!!
Unfortunately, one of the colors I received was dried up to the point where it was chunky and unusable, so I'm only able to review the yellow one.
Here are the two colors I received to review! The yellow is called "Day Camp" and the red is called "OMG!"
I think these are two cute names for a polish aimed towards children, and my daughter certainly likes them alot!
Now on to the actual polish!
We painted her nails with "Day Camp", and allowed them to dry. 
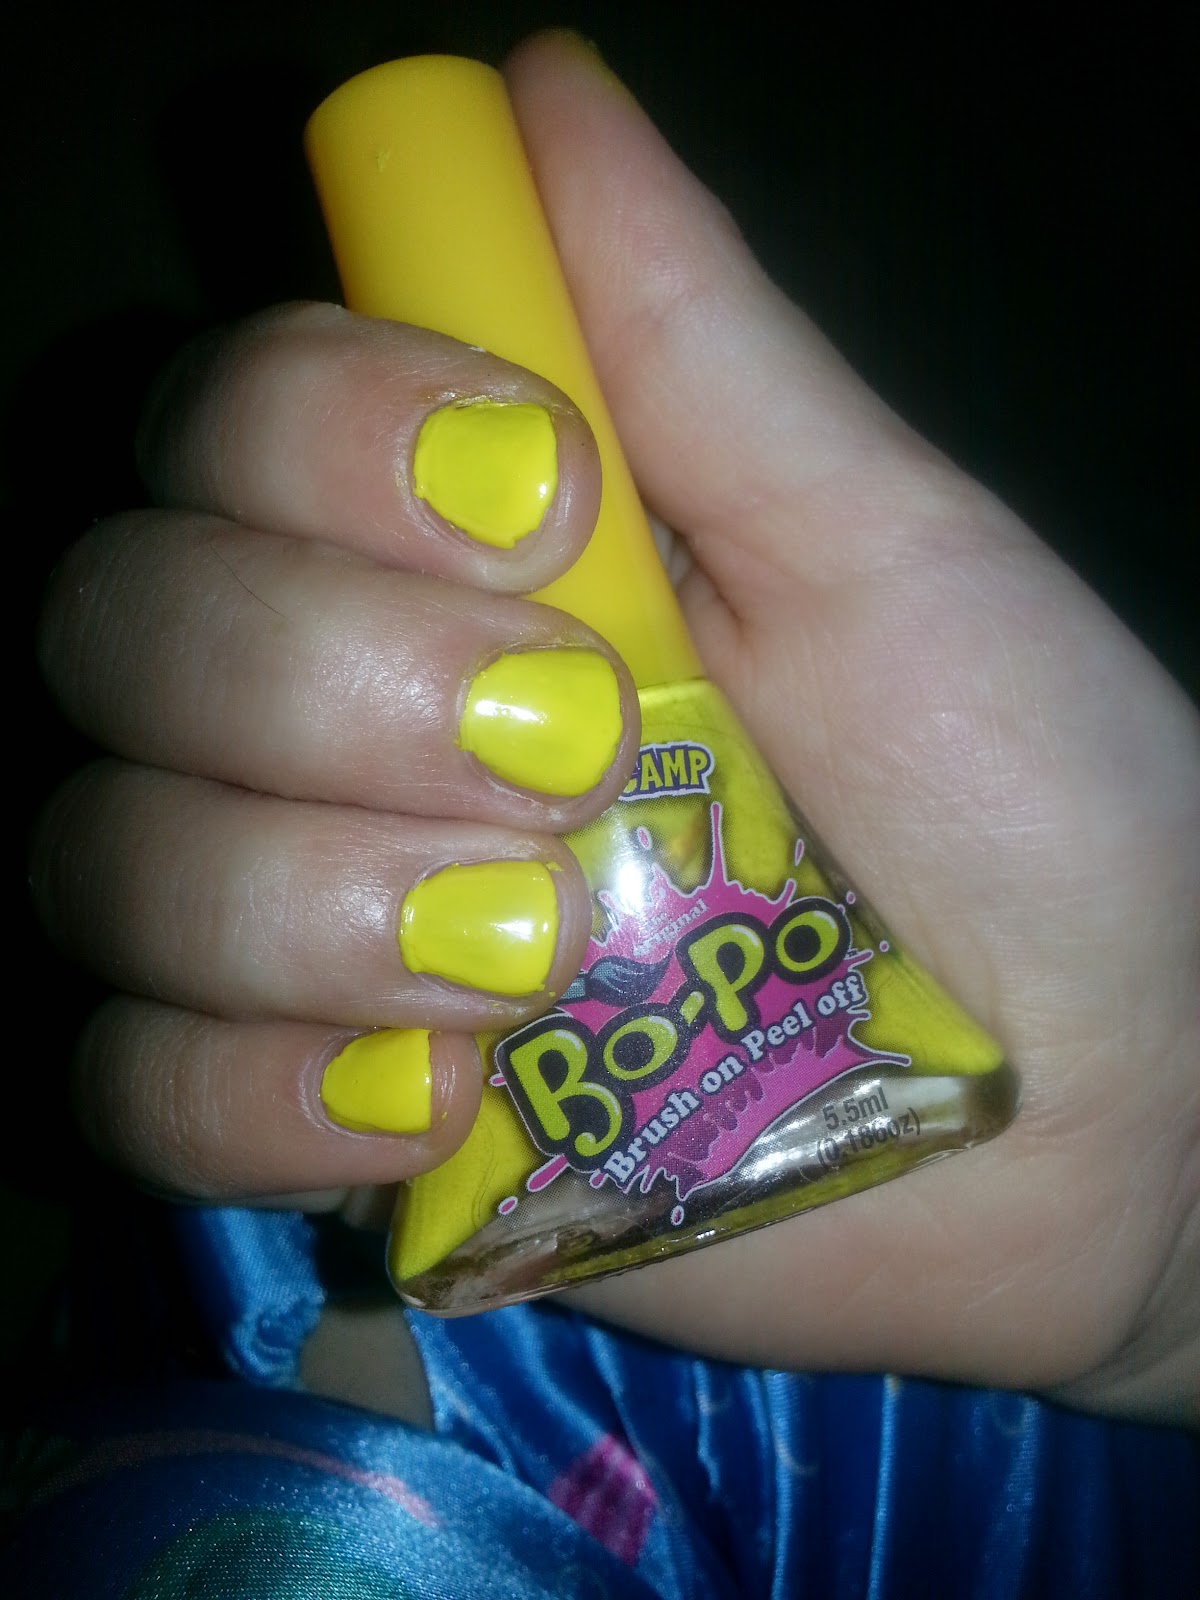
This is two coats, which led to full opacity. Pretty good for a kid's polish if you ask me!
Once they were dry, we decided to go ahead and test out how well they peel off for out review!
It's actually super easy to peel off, and required very little effort. Here's the start of a peel!
And nail polish begone! We decided to go ahead and peel off the whole hand since we were having so much fun!
So that's that! This product is super cool in my opinion. I wish we could have tried out the red, but I do like the yellow and will most likely be purchasing more for Adrienne in the very near future!
If you'd like to learn more about this product, here are some links and retailers where you can purchase it!
Thus far it comes in 10 colors! I'm probably going to try to collect them all!

Burlington Coat Factory
Bed Bath & Beyond 
Learning Express
Bealls Florida Dept Stores
The Johnson Smith Company

Also, Please check out the following links to state up to state with Worx Toys and this awesome polish!

NOW for the good stuff! I'm having FLASH GIVEAWAY for you or you children to have their very own opportunity to test out this amazing polish! It will end at 5 PM est tomorrow so you need to enter quick!!
This is unfortunately open to US only at this time! GOOD LUCK! I'll be contacting the winners right after it ends too, so be on the lookout!
a Rafflecopter giveaway
GOOD LUCK! & Thanks for reading!
xX Ashley C. I received one or more of the products mentioned above for free using Tomoson.com. Regardless, I only recommend products or services I use personally and believe will be good for my readers.

Monday, March 3, 2014

Julep Maven March 2014 Unboxing & Review!

Today I received my March Julep box! This is the first time in awhile I've been overly excited to order my Julep colors. I'm a sucker for anything bright and anything green, so I quickly knew what colors I wanted!

For those of you who don't already know, Julep is a monthly subscription service that provides the latest nailpolish colors right to your door for as low as $19.99 a month. Every month they come out with four different sets of colors and a beauty product based on your style profile, which is a quiz that allows them to decide which color you'd like best. You can either pick between these four, or opt for their Modern Beauty box, which is contains no polish and awesome beauty items instead! They also let you upgrade to get the whole collection! Sign up right now and use code FREEBOX to get your first box for only the cost of shipping!
Julep Beauty Inc.

Now on to my box!!! For March 2014, Julep brought us "The Riviera Collection"; nine beautiful bright spring colors and lipglosses. For Modern Beauty they brought us the "Buff Lip Scrub" and "Luxe Lip Conditioning Treatment". 
My style according to Julep's style profile is "Bombshell", which is the box I chose this month! Take their quiz HERE to see what yours is! :)

My March box contained:
Monaco - Dazzling Mariner Blue Creme (Pantone color of the year for Spring 2014)
Julep Lip Gloss in Fearless
Candy Cane Extra :)
Add ons:
Lizanne - Sea Green Shimmer
Tania - Multidimensional Mermaid Teal Glitter

Now, I usually don't get add ons, but I had to have these colors! I don't have any swatches of Lilou for you today, because I am thinking about selling or trading it, because I already have something similar, but here are the others!
I love LOVE LOVE Monaco. It's the perfect blue creme for spring and summer. I can't get enough blue polishes. And Lizanne is great too! Personally, I don't really see any "shimmer" once it is on, its more like a bright teal cream, but beautiful nonetheless! I used Tania as an accent over Lizanne.
In the bottle, Tania reminded me of Julep's Esmerelda, so I decided to do a comparison photo to see what the difference was. Esmerelda is one of my favorite Julep's I own.
The glitters in them seem to be very similar in color, but Tania has an opalescent base color that completely changes the color of the base nail polish. I'm interested to try it on it's own, but that's for another day!
Here's a swatch of the lippie I chose. It will be great for the spring and summer. It's a beautiful hot pink shimmer gloss that makes my lips shiny and fuller. I love it and can't wait to use it over a pink or red lipstick!
I love Julep's new glosses because they smell and taste super good and aren't overly sticky!

So that's my box! Like I said if you're not signed up for Julep already, definitely check them out! They have some great products as well as polish, and I'm sure you will be JUST as addicted as I am!
If you are signed up, which box did you get this month??? Love it or hate it?

Julep Beauty Inc.
Xx Ashley C.

Monday, February 17, 2014

Butter London Marshalls HAUL!

So I randomly decided to go to Marshalls the other day in the middle of a unexpected TN blizzard, and found a serious nail polish deal!! Never in a million years did I think there would be Butter London at a place like Marshalls, but they were there, and they were there CHEAP! I picked up each of these for a mere $6.99 a piece, which is way less than the $15 regular price tag.  I also grabbed a bottle of OPI Nail Envy for Sensitive and Peeling nails for $7.99 so that was over half off as well. I haven't tried it yet, since I'm still testing out Butter London Horsepower, but I will let you know when I do! I've put together a couple swatches for you since I got these!  Hope you enjoy!

First up is Butter London's Jack the Lad. I've been wanting this color ever since I found out about the Butter London Brand!  It's a Moss green shimmer, and definitely a one coater!  Who doesn't love a one coater?! Two if you're like me and do one more for good measure!  :)  Here's a quickie swatch I did on break at work!

Next, I decided to use Butter London Thames & Butter London Scallywag together for a cute, blue and green mani! To me, Scallywag is reminiscent of Julep's Carly and similar to Zoya's Liberty, but without as much texture as Liberty, since it's part of their Pixie Dust line (which btw I have added a link to the Summer 2013 Pixies which are only $7.19 at amazon with free shipping! They're normally $9 plus shipping). Scallywag is described as a full coverage turquoise glitter in a clear base. I used it over Thames and again I only had to do one coat for complete coverage! Thames is also really really beautiful. I love green nail polish first of all, and I love anything shiny too so it's a double win. It's described as a soft, blue green polish with a small undercurrent of gold. I guess the gold is what makes it so shiny. Anyway here's my mani!

Lastly, I purchased Butter London No More Waity, Katie. This one I was on the fence about because it looks kind of weird in the bottle. I think it's going to be passed on to a friend, but some of you may really like it! It's not something I would normally wear for sure. It's described as a soft, lilac glitter,  but I find it to be a bit more on the grayish side with purple glitter just hanging out in it. Here's a swatch of it too for your viewing pleasure! :)

I hope you guys enjoyed this post as much as I did!  I love that my Butter London collection us slowing growing larger because they make such GREAT polishes!  As far as I can tell all the ones I own are 1-2 coats for full coverage, but I guess you get what you pay for!  At $15 full price, they're not cheap, but if you can score a deal like I found, definitely scoop some up because they are so worth it!

Up next is my Pretty and Polished beauty box for March!  I'm really really excited to share this with you all, and I have subscribed for a three month subscription so there will be one every month until May! And THERE MIGHT possibly some special swatches of two of Pretty & Polished's new color changers that will be released very soon! Have an awesome Monday!
Xx Ashley C.

Monday, December 30, 2013

Guest Post!! Glam Box Review by Melissa!

So this new company was advertised in some of the beauty and polish groups I am in and I figured for $15.00 why not? I really didn't know what to expect but it its described as the same idea as ipsy and birch box and I love those so it was an instant sell for me! As you can see from the picture above the first thought I had when I opened it was WOW this is no Ipsy! (I just signed up for Birchbox and my first box is on it's way to me.)
I had thought that when they asked in my profile survey if I was married it was just for statistic purposes,but no they thought of my hubs and sons as well :) 
Warning! Spoiler Alert! :)


Sunday, November 24, 2013

Christmas Lights Nail Pictorial!

This year I am feeling unusually festive. I've already decorated my house with Christmas lights, and have been pinning Christmas nails and crafts like a mad woman. I know it's not even Thanksgiving yet, but I've already done my Thanksgiving nails for the year, and I can't think of anymore to do. Don't worry I'll show you those in a minute. :) It's freezing in Tennessee today and it already feels like winter so why not get a head start!! Christmas nails are my favorite to do and there's endless possibilities!!! Here is a simply, three step tutorial for some ADORABLE Christmas light nail art.

But first, here's my turkey Thanksgiving nails for your viewing pleasure.

On to the Christmas lights! For this mani I used:
The first step is to paint all of your nails white. I tried to pick a nice opaque white with little to no shimmer. Next, I went ahead and added a coat of my fast dry topcoat to make the nails dry enough to start painting on the lights! I also went ahead and cleaned them up to ensure there would be no bleeding of the colors together from the remover in cleaning up later.


The next step is to paint on your string that the lights are going to painted on. I picked black for this, but green would also work if you're looking for a more traditional Christmas light feel. I used the thinnest brush in my collection that I could find. I also saw on Pinterest that you can use a piece of thread for this to make a really thin string of lights. You just place it where you want while your nails are still tacky and trim it then put a topcoat on to hold it in place.  


Next, use a small brush, dotting tool, or even a toothpick to carefully paint on the lights. I used a toothpick that way I could get a tiny triangular shape for the lights. It allows for precision and I think if you're a beginner it would be your best bet. The best part is you can pick any color you want! You can do just red and green, or multicolored lights like I did! Just make sure and alternate the colors you're using. I painted on one color at a time. I used red, blue, green, and yellow. Sorry for the bad quality photo. My camera was not cooperating. :( Once you're done with that, add on your favorite topcoat and you're done!

And that's all there is to it! Super easy, Super cute nails for Christmas!
Here's a picture of my favorite one! :)

Hope you guys enjoyed my tutorial!!! I think these nails are super cute and I will definitely be trying them again with different variations and hopefully a little less mess. Until next time!

Xx Ashley C.

Tuesday, November 5, 2013

Nutra Nail Speed Dry Top Coat Review

Recently, I ran out of Seche Vite. Sad day. Apparently, Walgreens doesn't carry it, so I picked up a bottle of Nutra Nail's Speed Dry 30 Second Top Coat. I'd used their Nail hardener before and really liked it. Plus, I did some quick searching for topcoat reviews and for the price, it seemed like a good buy. It cost a mere $3.99!!!

Nutra Nail® Speed Dry 30 Second Top Coat
Overall, I really like this topcoat. I find it comparable to Seche Vite with significantly less shrinkage. It takes a little bit longer to dry your nails and is not quite as high gloss. That being said, if you follow the instructions and wait 1 minutes after painting your nails to apply it, it dries them to the touch in about another minute! This works for me! I don't know about you, but I always find that I have something important to do right after I finish my nails and end up screwing them up, so fast dry time is my number one priority!!!

Here are some pictures of my current mani with the Nutra Nail Top Coat! I took these pictures on day two so you will see there is minimal shrinkage, no chipping, and they still look FABULOUS!
For this mani I used:
Julep - Evangeline (LE Holo from 2013 Cupid's Mystery Box)
Sally Hansen- Black Out
Nutra Nail Speed Dry Top Coat

Here is a picture with flash!

And a grainy one without!
EDIT: I should probably mention that I have an office job and type constantly all day. My nails usually chip an hour after coming to work, so this is extra impressive for day 2!

Isn't it great!? 
Xx Ashley C.

Sunday, October 13, 2013

Ghost Nail Tutorial!!

I love October. More importantly I love Halloween. Especially Halloween inspired nails. I did Nicole's nails Friday night and we decided on ghost nails. Even better they glow in the dark! :)
Here's how you can do it yourself!!

For this mani we used:
Julep - Cleopatra
Sally Hansen - Hard to Get
Random black nail polish
Night Lights Glow in the dark polish that I bought from Sally's years ago... it's great.


And here's what it looks like completed!!


And here's the glow in the dark!! 

Hope you enjoy this super easy Halloween inspired tutorial!!
:D Xx Ashley C.


Wednesday, October 9, 2013

Mani of the day!!

I'm so so so excited for fall!! I can finally wear my sweaters, boots, hoodies and fall colored nail polishes!! For my nails today I decided to do a glitter ombre! I am OBSESSED with glitter ombres and fades right now. They are super cute for any season but I think my favorite gold glitter is perfect for fall! I probably need a little bit more practice with them but I'm really liking my nails!! Hope you enjoy! :)

For this mani I used:
Sephora by OPI - I'm with Brad
Sinful Colors - All About You

The glitter ombre itself was really easy to do! All you need is a makeup sponge. First paint you nails a solid color and wait until they are almost all the way dry. Then you paint the glitter onto the sponge and just sponge it on slowly and make sure there is more at the tip of the nail! :) Then seal it with a topcoat of course!


Another tragedy I'm also out of cuticle oil!!! Anyone have any suggestions for a brand that will help a really big problem with cracking cuticles???


Hope you guys enjoy it as much as I do!! :)
Don't forget to subscribe and like us on Facebook!!
Xx Ashley C.

Saturday, October 5, 2013

Music Note Nail Tutorial!

Last night I did the cutest nails and I figured I'd show you how to do them as well!! It's one of the easiest tutorials ever so here you go!

For this mani I used:
Julep - Annette
Sally Hansen Xtreme Wear - Black Out
Seche Vite Top Coat

First you paint your nails a solid color. I picked Julep Annette because it's kind of grey and kind of white and I hoped it would go on smoothly. It, however went on horrible and gloopy so forgive the mess. I should have just used regular white.

Next take a striping brush and paint three thin lines on the tips of each nail like this:
Mine are a little messier than I'd like them to be.

Next with a dotting tool, pen, bobby pen end, or a rounded end brush paint two dots on the lines. I did some of mine on the lines and some of them in between so the notes weren't on the same lines on each nail. :)


Then you finish off the notes. Paint lines on the dots on the right side and form your notes! I chose to do different notes on each nails to make it look more like sheet music. :)


And you're done!! Super easy peasy and adorable nail art for your weekend!
Enjoy!

Don't forget to subscribe and follow us on Facebook to get all the updates! :D

Xx Ashley C.


Tuesday, October 1, 2013

Mini Drugstore Haul!

Walgreens is pretty much my favorite drugstore ever. They always have the best stuff on sale!!! I told you guys I was going to get another Wet N Wild palette and lucky me they were still on sale for $2.00!!!!


I picked up Walkin' on Eggshells which is one the of neutral trios. Can't wait to test it out tomorrow!! You can buy it here!! 

I also have been dying for some gel liner.... mine from Sephora is sadly all dried up and I was on a super budget so I decided to pick up some Elf cream liner for $3.00!! I've never tried it before but I like the Elf products that I have tried so far so I figured why not. Pretty excited! Even more excited now that I just realized it comes with a brush too! 
I know I said yesterday I was going to review the Julep liner today.... BUT I woke up way later than anticipated this morning and did a bad job on my makeup. I'm probably going to actually review both Julep and Elf liners tomorrow or this next day so watch out!!

I also grabbed two really great looking nail polishes by Sinful Colors because they were 2/$3 and the matte color display totally sold me. I bought a reddish orange matte color called "Laced Up" and a Hot Pink/Fuschia color called "Forget Now". I tried out Laced Up earlier and it goes on really really nice. It only took two coats and went on perfectly smooth. I can't really decide if it is more orange or more red.... I vote orange and my husband votes red... So you can decide... Please ignore my horrible black tips I was going to Halloween colors. lol I also haven't even bothered to clean up. :)

  
So great and matte. 

AND last but certainly not least my husband had two wonderful gifts waiting on me when I arrived home... in the form of mustaches. 


Have a great night!!! 
Xx Ashley C. 

Monday, September 30, 2013

Julep Maven October Bombshell Unboxing!

For those of you who don't know what the Julep Maven program is, its a month polish subscription box with different style profiles. You receive either 2 polishes and one beauty product, two beauty products, or three polishes for $19.99 a month. It's usually hit or miss with me but lately I have been loving what they have!!
If you want to sign up you can use my referral link HERE and use the code "FREEBOX" to get your first box for free. They also give you the option of adding additional polishes on for like... $4.99 which is super cheap! That's how I ended up with almost 100 lovely Juleps in my collection. :)


I was so excited to receive my October Julep box today. I want to apologize in advance that I took the majority of these photos with my cell phone in my car. I couldn't contain myself any longer!!! This box is so awesome. Not only was it free but I love every single thing in it. I only wish I had ordered some add ons... especially Casper... which glows in the dark...

ANYWAYS here is my October Maven box this month!!!

Julep did a pretty bad job wrapping up my goodies this month... but that okay. It's what's inside that counts right?

And here's what it looked like without the tissue paper.

I received the Bombshell box this month, which is the one the quiz picked out for me... I'd say its pretty accurate. Bombshell is usually what I order.

This months Bombshell Maven box came with their Kajal eye glider (eyeliner) in a dual ended pencil in brown and black, a "black latex" color called Cleopatra, and a greenish teal microglitter color called Valerie which I've heard has been for sale at Sephora for awhile. They also added a little bag of candy corn which I love so that is pretty great too.


Not going to lie I was a little on the fence about the whole nailpolish maker making an eyeliner thing... but I actually really like what I see so far with this liner. I'm a bit of an eyeliner snob as you've probably noticed and I usually only use gel and liquid, but the Kajal liner I received is nice and dark and goes on really smooth. I only wish we could have chosen between brown and black and not gotten a dual pencil. I never use brown liner. Only black. 
It also came with what Julep has deemed "the best sharpener they've ever used" but I haven't used it yet. I don't really see what could be so special about it.... :) 

See how nice and rich the colors are?! So excited to use it for work tomorrow.

Here's another swatch picture for you.

This is really the only picture I took that properly shows all the shimmer in Valerie.. It's a really really pretty greenish teal color with lots of different colored shimmer. It only took two coats on my toes to be fully opaque.

Without flash
With flash

And overcast outside

Maybe I'm missing something here but I'm pretty sure Cleopatra is just a matte black. Either way I'm really in love with it. It went on sooo smooth and again, two coats and it was totally opaque. Clean up was super easy and it dried really fast. Cleopatra is going to be a great color for Fall/Halloween for me.

Here is Cleopatra with Valerie dots as an accent... but you can't really see them. Both great colors though, just not so much together :)

And here is it again wish flash for you!

So that is my October Bombshell box. Overall it is super great and I will try out the eyeliner for real tomorrow and type up a little review of it!!! :) Have a good night and don't forget to follow us on here and on Facebook!!

Xx Ashley C.